
I took some time to investigate developing a MAUI mobile app that shares business logic with a Blazor web app by way of ViewModels and the like. What I discovered was that MAUI and XAML is a pretty cumbersome framework. My colleague Kael gave me some insight on the possibility of building a Blazor app and running that as a MAUI app. After looking into it in more detail I came to the conclusion that having a single application with multiple deployment targets is a more practical approach to cross-platform development. This article serves as a guide to developing a single application that can be deployed as both a website and an Android app. Of course there are a few platform specific things to look out for but they’re easily handled as I will demonstrate in this post.
But first, why exactly would you want to go down this route? In my mind, apps should be developed specifically for the platform they’re targeting. I figure this way they’ll be performant and consistently adhere to the platform’s own design. The reality seems to be that app designs are so wildly inconsistent anyway that there isn’t much value in this way of thinking. As for performance, although I haven’t measured it I reckon the difference for your run of the mill line of business app would be largely negligible. As the ASP.NET Blazor Hybrid documentation states:
In a Blazor Hybrid app, Razor components run natively on the device. Components render to an embedded Web View control through a local interop channel. Components don’t run in the browser, and WebAssembly isn’t involved. Razor components load and execute code quickly, and components have full access to the native capabilities of the device through the .NET platform.
Of course the real bonus of doing this approach is that there is only one UI to maintain. Perhaps you’d want to go full MAUI if the mobile app designs are significantly different from the web app design, but from my experience they generally follow almost identical patterns.
This guide pulls information from the ASP.NET Blazor Hybrid documentation, the following pages are especially helpful:
This guide assumes you have Visual Studio Code installed. You will also need:
- .NET 8.0 SDK (this is in pre-release at time of writing, I am using RC2)
- .NET MAUI Extension for VS Code
- OpenJDK 17 - note that builds will fail if OpenJDK 11 is used instead, despite what the Microsoft documentation says here
- If you use Chocolatey on Windows, you can install microsoft-openjdk17
- On Fedora, install java-17-openjdk
- Android Studio which can be easily installed with a command as explained later in this guide
Create Razor Class Library
The Razor Class Library contains the majority of the application and is referenced from the MAUI Android and Blazor web projects.
Open a terminal and navigate to the directory that will serve as the root of the solution. Run the following to create a Razor Class Library project, substituting the name if necessary:
dotnet new razorclasslib -n AppComponentsDelete some things:
- Delete the wwwroot directory
- Delete Component1.razor and Component1.razor.css
- Delete ExampleJsInterop.cs
Create MAUI Android Project
This project is deployable to Android devices; essentially a MAUI app hosting Blazor components.
Using the terminal, run the following command to install the MAUI Android SDK:
dotnet workload install maui-android- You can substitute
maui-androidformauito install SDKs for all target devices. Rundotnet workload search mauito see what else is available.
- You can substitute
Go to the root of the solution and run the following to create a MAUI Blazor Hybrid app:
dotnet new maui-blazor -n AndroidAppOpen the AndroidApp.csproj file and make the following alterations:
- Remove target frameworks that you don’t need from the
<TargetFrameworks>tag - Look for the tags
<SupportedOSPlatformVersion>and<TargetPlatformMinVersion>and again remove the entries that do not apply to your app
- Remove target frameworks that you don’t need from the
Delete some things:
- Open the Platforms directory and remove platforms you don’t intend to target
- Remove the Components directory
Install Android dependencies (i.e. Android Studio and associated tools) by building the new project with the following command:
dotnet build -t:InstallAndroidDependencies -f:net8.0-android -p:AndroidSdkDirectory="<android-sdk-directory>" -p:AcceptAndroidSDKLicenses=True- For Windows, the suggested Android SDK Directory is
$env:LOCALAPPDATA/Android/Sdk - For Linux, you could use
~/.local/share/Android/Sdk
- For Windows, the suggested Android SDK Directory is
Open the VS Code command palette and run .NET MAUI: Configure Android, choosing Refresh Android environment, it will notify you of any missing components.
Ensure the Android SDK and Java SDK (OpenJDK) paths are correctly set; if not, they can be set under the .NET MAUI: Configure Android command
In my case I was missing the Android 34 platform, the Android 34 image and cmdline-tools.
- Open Android Studio from the install directory specified before
- From the main screen, click the More Actions menu and select SDK Manager
- Under the SDK Platforms tab check the Show Package Details option at the bottom of the screen
- Expand Android API 34 in the list and select the following:
- Android SDK Platform 34
- Sources for Android 34
- Google APIs Intel x86_64 Atom System Image
- Go to the SDK Tools tab and check the Show Package Details option again
- Find the heading for Android SDK Command-line Tools (latest) and choose version 7.0
- Find Android Emulator in the list and make sure it’s checked
- Click the Apply button to install everything now
Run it again and make sure it’s all tickety-boo, it should look something like a-this:
user preferred path: c:\Program Files\Microsoft\jdk-17.0.8.7-hotspot
JAVA_HOME: C:\Program Files\Microsoft\jdk-17.0.8.7-hotspot
Java SDK: shared with Visual Studio [installed]
Android service Java SDK found: C:\Program Files\Microsoft\jdk-17.0.8.7-hotspot
user preferred path: e:\AndroidSdk
MSBuild AndroidSdkDirectory: E:\AndroidSdk
ANDROID_SDK_ROOT: E:/AndroidSdk
ANDROID_HOME: E:\AndroidSdk
Android SDK: custom [installed]
Android service Android SDK found: E:\AndroidSdk
Android SDK recommended required components:
    platforms/android-34  installed
    build-tools/32.0.0  installed
    platform-tools  installed
    cmdline-tools/7.0  installed
Android SDK recommended optional components:
    emulator  installed
    system-images/android-34/google_apis/x86_64  installed
Create Blazor Web Project
This project is a Blazor WASM app that runs in a web browser.
Using the terminal, go to the root of the solution and run the following to create a Blazor Web app:
dotnet new blazorwasm -n WebAppUh… there is no step 2
Setup Project References
Use the terminal to add the projects to the solution by entering the following from the solution’s root directory:
dotnet sln add AppComponents
dotnet sln add AndroidApp
dotnet sln add WebApp
Add references to the AppComponents project to the other two projects:
dotnet add AndroidApp reference AppComponents
dotnet add WebApp reference AppComponents
Migrate Blazor Components
Move the directory Components from the WebApp Blazor project and put it into the root of the AppComponents project.
Open the file _Imports.razor under AppComponents/Components
Remove the following line:
@using Microsoft.AspNetCore.Components.WebAssembly.HttpChange the instances of
WebApptoAppComponents(VS Code protip: click on one of them and pressCtrl+Shift+Lto change them all at once) and save your changesOpen the file Program.cs in WebApp project
Alter the
usingstatement that referencesWebApp.Componentsto beAppComponents.ComponentsOpen the file _Imports.razor under AndroidApp
Alter the
@usingstatement that referencesAndroidApp.Componentsto beAppComponents.ComponentsOpen the file MainPage.xaml under AndroidApp
Change the line with
xmlns:localto point to the AppComponents project instead:xmlns:components="clr-namespace:AppComponents.Components;assembly=AppComponents"In the
<RootComponent>tag, set theComponentTypeproperty to{x:Type components:App}
Running on Android
Bring up the command palette (
Ctrl+Shift+P) and choose .NET MAUI: Configure Android- Use the option for Set Android SDK Path to point to the Android SDK
- Use the option for Set Java SDK Path to poi– ah, you know what it does.
Run
dotnet buildat the solution level to attempt a build.- If it complains about being unable to find the Android SDK, add the following line to
AndroidApp.csprojsomewhere inside the first<PropertyGroup>tag:<AndroidSdkDirectory>path/to/androidsdk</AndroidSdkDirectory>
- If it complains about being unable to find the Android SDK, add the following line to
To run the Android app, first set the Debug Target by opening a project file such as any .cs file. Click the {} icon next to the C# icon at the bottom-right of the VS Code Window. Choose Debug Target and set up an Android emulator if you haven’t done so already.

Ensure the startup project is set to AndroidApp from the same menu.
Go to the Debug panel and click create a launch.json file. Choose .NET MAUI from the Select debugger options. This assumes that no launch.json has been set up yet. The configuration for a .NET MAUI app looks like the following:
{ "name": ".NET MAUI", "type": "maui", "request": "launch", "preLaunchTask": "maui: Build" }- Note that the prelaunch task is built-in to the MAUI extension
Press F5 to launch the Android app in an emulator
Running in the Browser
Go to the Debug panel and click the debug target drop-down menu, selecting C#… and then choose C#: WebApp [Default configuration]
Press F5 to launch the Blazor app in a browser
Platform Specific Features
Alright, now how to handle platform specific features? Gotta be some awkward switch statements or deployment directives to choose the right approach, right? Nah, Dependency Injection got you fam. I’m gonna demonstrate a common “notification” message. Now, the two methods of notification I will be employing are not strictly analogous and the implementation is no more than rudimentary, but it’s all about explaining the principle so you can build on it yourself..
Create a folder called NativeInterfaces in the AppComponents project, then create an interface with the filename INotification.cs and add the following code:
namespace AppComponents.NativeInterfaces;

public interface INotification
{
    public Task ShowNotification(string message);
}
Yes, you're right. This interface doesn't really belong in a project called _AppComponents_. I would recommend you create another project for this sort of common functionality, but for the simplicity of this demonstration it is going in here.Add the Nuget package Plugin.LocalNotification to the AndroidApp project:
dotnet add AndroidApp package Plugin.LocalNotificationCreate a folder called NativeImplementations in the AndroidApp project, then create a class with the filename AndroidNotification.cs and add the following code:
using AppComponents.NativeInterfaces;
using Plugin.LocalNotification;

namespace AndroidApp.NativeImplementations;

public class AndroidNotification : INotification
{
    public async Task ShowNotification(string message)
    {
        var request = new NotificationRequest {
            NotificationId = 1000,
                Title = "Blazor MAUI",
                Description = message
        };
        await LocalNotificationCenter.Current.Show(request);
    }
}
Open MauiProgram.cs in the AndroidApp project
Find the line with
builder.Services.AddMauiBlazorWebView();and add the following below it:builder.Services.AddScoped<INotification, AndroidNotification>();Open the AndroidManifest.xml file under AndroidApps/Platforms/Android and add the following before the closing
</manifest>tag to allow the app to send notifications (documentation):<uses-permission android:name="android.permission.WAKE_LOCK" /> <!--Required so that the plugin can reschedule notifications upon a reboot--> <uses-permission android:name="android.permission.RECEIVE_BOOT_COMPLETED" /> <uses-permission android:name="android.permission.VIBRATE" /> <uses-permission android:name="android.permission.SCHEDULE_EXACT_ALARM" /> <uses-permission android:name="android.permission.POST_NOTIFICATIONS" />Create a folder called NativeImplementations in the WebApp project, then create a class with the filename BrowserNotification.cs and add the following code:
using AppComponents.NativeInterfaces;
using Microsoft.JSInterop;

namespace WebApp.NativeImplementations;

public class BrowserNotification : INotification
{
    private readonly IJSRuntime js;

    public BrowserNotification(IJSRuntime jsRuntime)
    {
        js = jsRuntime;
    }

    public async Task ShowNotification(string message)
    {
        await js.InvokeVoidAsync("alert", message);
    }
}
Open _Imports.razor in the AppComponents project and add the following line:
@using AppComponents.NativeInterfacesOpen Home.razor in the AppComponents project and inject
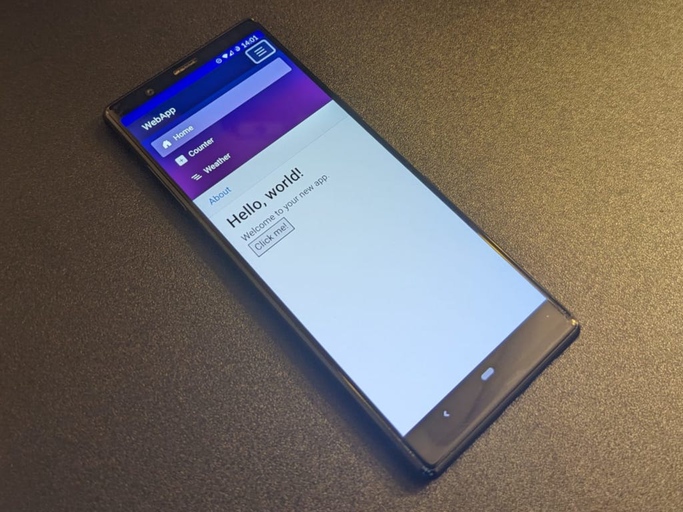
INotificationas a service under@page "/":@inject INotification NotificationServiceThen add a new button under the text
Welcome to your new app:<p> <button onclick="@(async () => NotificationService.ShowNotification("Potatoes"))">Click me!</button> </p>Open Program.cs in the WebApp project and add the following line above
await builder.Build().RunAsync();:builder.Services.AddScoped<INotification, BrowserNotification>();Run the app on whatever platform you like and profit!
© Copyright 2026
Phil Watson
Last updated
Saturday, 23/May/2026 14:43 +1000